I may receive commissions from purchases made through links in this article at no additional cost to you. Read full disclosure.
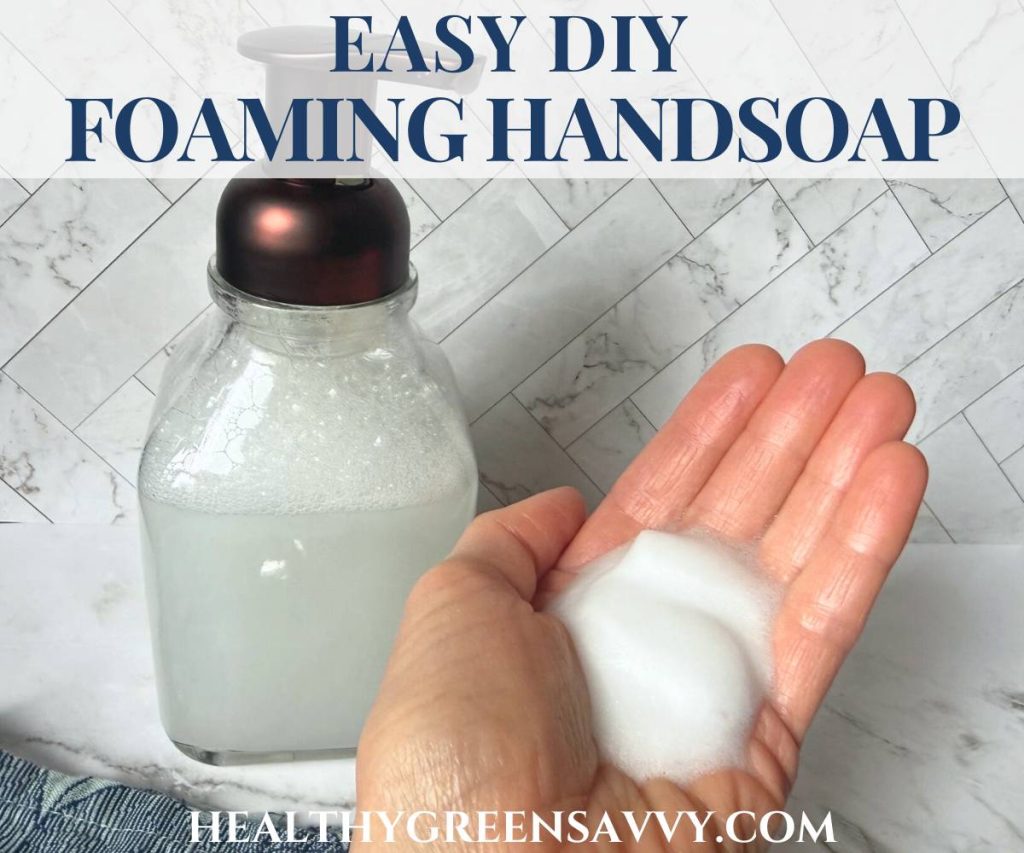
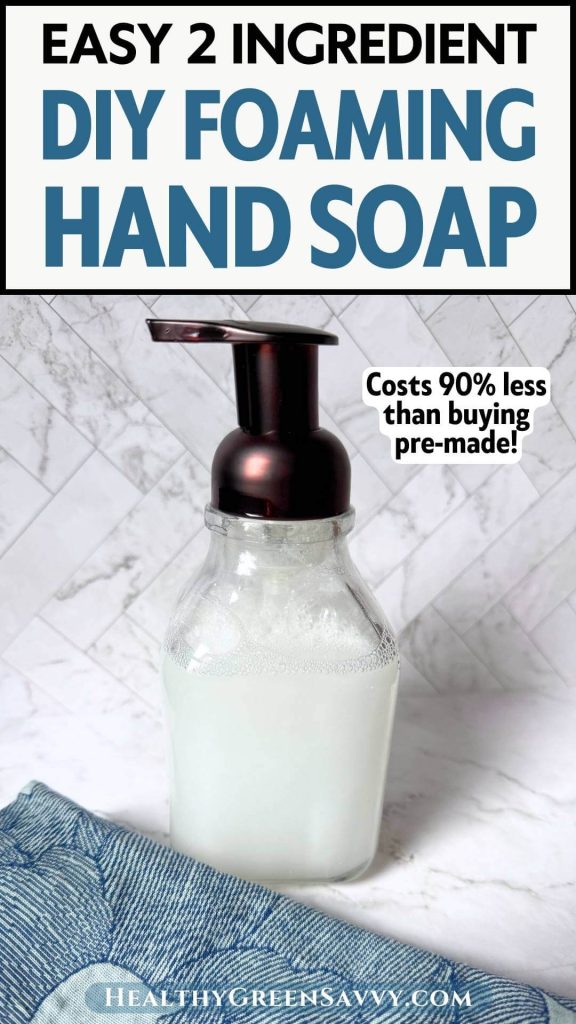
You can save money and help the planet by making your own foaming hand soap. DIY foaming hand soap is a snap to make and will save you SO much over buying little plastic bottles of hand soap.
Why Make DIY Foaming Hand Soap?
Whether you’re interested in trimming your household budget or want to waste a lot less plastic, this DIY foaming hand soap is a no-brainer. If you also care about protecting your family from chemicals, making your own hand soap can let you control the ingredients and skip all the questionable stuff in most handsoaps.
Then there’s the money savings. If you’re buying little bottles of hand soap, most of what you’re getting is just water. A 10 ounce bottle of foaming hand soap may contain less than 1 ounce of actual soap, with the rest taken up by water.
The least expensive options you can buy already-made cost about $3 for just 10 ounces, with natural brands running considerably more. When you make it yourself, the soap you need to make it costs around 30 cents, 1/10th as much as the cheapest chemical foaming soap!
For a long time I was able to buy a locally-made liquid hand soap sold in bulk at our co-op. You’d bring a container to refill, so plastic waste was greatly reduced. But then it stopped being available.
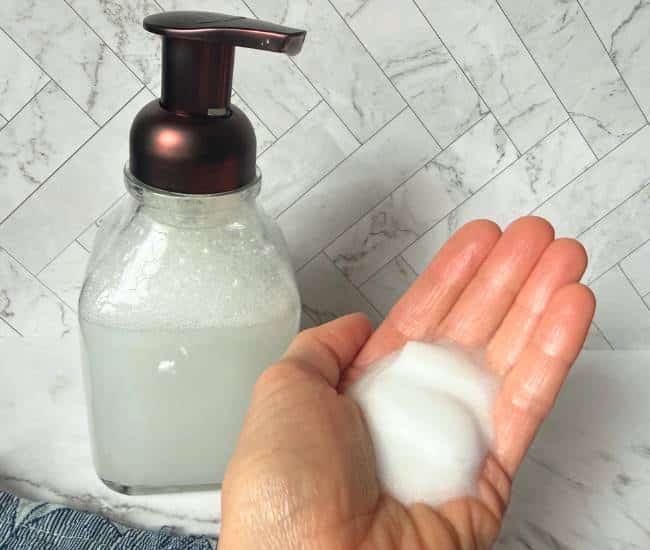
That’s when I learned you could make your own foaming hand soap using a small amount of castile soap and water. I’ve never looked back. We save a huge amount of money and plastic over buying bottles of natural hand soap, and I always have plenty on hand when a dispenser runs low.
But the savings don’t end there: Foaming hand soap also uses less soap per hand wash than liquid soap. Instead of a huge dollop of liquid soap, you get just what you need to get your hands clean. I’ve read it rinses off more easily as well, so you use less water to rinse as well. This is one easy way to shift toward living more sustainably.
Foaming soap also doesn’t clog the dispenser, so you don’t get those messy, wasteful sideways squirts that sometimes happen with liquid hand soap. And by not buying something that’s mostly water already, you’re slashing the carbon pollution caused by shipping something unnecessarily heavy.
Does DIY foaming soap clean hands effectively? Though I haven’t had formal lab tests done to check, I’ve put it to the test in our home time and again. When I’ve got a cold, I wash my hands thoroughly before getting food for the rest of the family, and in general, no one else catches it from me. Not scientific proof exactly, but good enough for me to feel comfortable relying on it for germ removal.
How to Make DIY Foaming Hand Soap
The basics of making DIY foaming hand soap is super simple: You add some liquid castile soap (which is more concentrated than standard hand soap) to some water. You can add a little oil for extra moisturizing if you like, but you might not need it. You can see if the soap base you use is drying or not and add oil after if you like. I like keeping things simple, so I don’t use any oil.
Some people add essential oils for scent, but I don’t recommend it. Besides the extra expense, essential oils are very resource-intensive to make, so I suggest saving them for where they’re needed, like DIY bug spray or homemade bath salts. Many of the castile soaps you can find are already scented.
If you’re concerned about bacteria, you could add a little antimicrobial essential oil. But I suggest avoiding tea tree oil, which is among the essential oils studied for hormone disruption. Also citrus oils, which can make skin photosensitive.
What You Need to Make DIY Foaming Hand Soap
Castile soap: Dr. Bronner’s is easy to find, though it’s more expensive than some other brands, and I’ve found it drying since I don’t add oil ours. But it comes in paper cartons now, which is a nice option.
I like the simple ingredients on Dr. Wood’s soap, and it costs less, especially during one of Vitacost’s many sales. (You can also find it on Amazon.) I’ve also used Glonaturals almond, which is much less drying than others I’ve tried, though its ingredient list isn’t as clean as I’d like.
Boiled and cooled water: It’s important to boil the water to kill any microbes in it. I use an electric kettle to boil the water, then allow it to cool before mixing with castile soap. You can also buy distilled water if you’d rather, though that’s more plastic and expense.
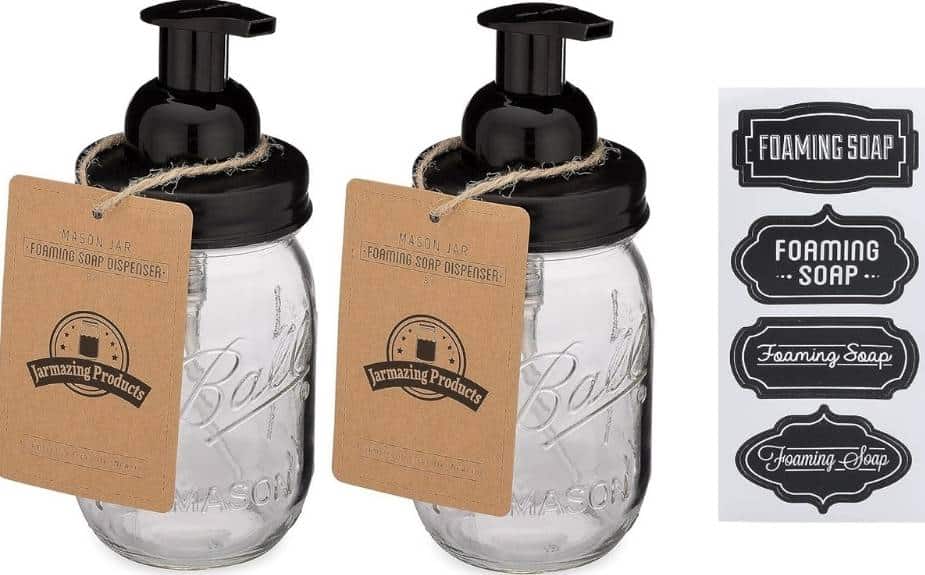
Foaming soap dispenser: You can reuse an old foaming soap dispenser, but they will tend to break and jam sooner than heavier-duty ones. When they’re no longer usable, there are some good options made of glass, ceramic, or plastic.
You can also get tops that attach to mason jars. Aren’t they cute?
I’ve tried a number of different pumps and found that some die faster than others. Here are the ones that have worked best for us:
I like the look of glass, but I’m not as comfortable leaving those in showers or where kids can knock them over. These clear plastic ones and these white ones are inexpensive and attractive enough. They’re larger than some, so need refilling less often. They’re holding up after several years of use.
These are the smaller, basic ones we use in our showers. Many have held up for years.
Large measuring cup. If you want to measure rather than eyeball your soap-to-water ratio, a large measuring cup comes in handy. The spout helps make pouring into your soap pumps much easier and reduces spillage.
Measuring cup or spoon. The basic ratio I use is 1 tablespoon castile soap to 6 ounces water. You can use a quarter cup measure if you’re adding to 24 ounces of water, or use a tablespoon of soap for each 6 ounces of water.
(Optional) Glycerin. A little vegetable glycerin may help make soap less drying if you find that’s a problem for you.
Time-saving tip: I make a lot of foaming soap at a time and distribute it throughout the house in empty castile soap bottles. Then we refill from those as needed, saving the need to boil and cool water when the third-floor pump has run out.
How to Make DIY Foaming Hand Soap
How to Make DIY Foaming Hand Soap
This simple DIY foaming hand soap takes less than a minute to make, but saves so much money, plastic, and soap!
Materials
- 24 oz tap water, boiled and cooled (or distilled water)
- 1/4 cup (4 tablespoons) liquid castile soap
Tools
- Measuring cups
- Foaming hand soap pump
Instructions
Put cooled water in a large measuring cup, then add castile soap and stir to combine.
For additional softening, you can add a teaspoon of glycerin.
If you prefer scent, a few drops of essential oils could also be added.
Alternatively, you can use the ratio method (which uses a lot more soap) and pour soap directly into pumps, then top with water.
Notes
See FAQs for information about shelf life and other common questions.
FAQs
How long does DIY foaming hand soap last?
Some sources suggest using up your foaming hand soap in 4 weeks, some say 1 week. Dr. Bronner’s points out that diluting soap also dilutes the preservatives and suggests using it up DIY foaming soap within 2 to 4 weeks. Note their instructions call for a 1:3 ratio of soap to water, much higher than this recipe.
Some foaming soap recipes call for water straight from the tap or distilled. I recommend boiling tap water first to kill bacteria and have never used distilled water.
The soap I recommend contains both vitamin E and rosemary extract as preservatives, but they will be extremely diluted by all that water. Though I couldn’t find a hard and fast rule for shelf life, it’s probably best not to make more than you’ll go through in a few weeks.
What kind of soap should you use to make DIY foaming hand soap?
Some people use standard hand soap and dilute it, but the vast majority use castile soap. I’ve heard of some people using dish soap as well. The point is to dilute the soap so you’re able to use it more efficiently.
Have you ever tried making your foaming hand soap? Please leave a comment with tips on your favorite way to make it!
Save this DIY foaming hand soap for later!
Susannah is a health and environmental writer focusing on gardening, foraging, medicinal plants, and sustainability. Her work has appeared in Mother Earth Living, Ensia, Northern Gardener, Sierra, and on numerous websites. Her first book, Everything Elderberry, released in September 2020 and was a #1 new release in holistic medicine, naturopathy, herb gardening, and other categories. Find out more and grab your copy here.

 Hi, I'm Susannah, a garden geek, energy nerd, and fan of healthy food and natural remedies. Need some simple, practical solutions for living healthier and greener? You've come to the right place! More about me and my green projects
Leave a Reply